Petielle feature image for a petite workwear sizing guide titled How to Read Workwear Size Charts When You're Petite, with three illustrations showing a woman measuring her waist in front of a mirror, hands holding a phone displaying a petite size chart, and a folded navy trouser with a tape measure on a flat surface.

How to Read Workwear Size Charts When You’re Petite?

You measured yourself once three years ago. Wrote down “size 4.” Now you order a 4P in every workwear brand you find online. Half of it goes back. The blazer shoulders droop past your arms. The trousers bunch at the knee. The blouse gaps at the bust and hangs past your hips.

Here is the problem. A 4P at one brand and a 4P at another are not the same garment. Most size charts do not measure the same things either. Some show your body measurements. Others show the measurements of the clothing itself, laid flat on a table. If you do not know which one you are reading, you are guessing. Guessing is expensive.

This guide walks you through petite workwear sizing the right way. You will learn how to take your own measurements. How to read any size chart correctly. And how to stop ordering clothes that look polished on the model but arrive looking borrowed. The whole process takes about 20 minutes the first time. After that, you will have a personal reference card that works across every brand.

No more returns. Pick up a tape measure and let’s get your numbers right.

Quick Reference Card
How to Read Workwear Size Charts When You’re Petite
What You Need
Soft fabric tape measure  •  Full-length mirror  •  Fitted clothing to wear while measuring  •  Pen and paper or phone notes  •  One well-fitting workwear piece  •  Flat surface
Measurements to Take
Bust (fullest point)  •  Waist (narrowest point)  •  Hips (widest point)  •  Inseam (inner thigh to ankle bone)  •  Rise (waist to crotch)  •  Shoulder width (bone to bone)  •  Sleeve length (center back neck to wrist)
Steps at a Glance
1. Gather tape measure and a well-fitting outfit
2. Measure bust, waist, and hips
3. Measure inseam to ankle bone
4. Measure rise from waistband to crotch seam
5. Measure shoulder width and sleeve length
6. Find the brand’s petite size chart for the specific item
7. Check if the chart shows body or garment measurements
8. Match your widest measurement to the chart first
9. Cross-check vertical proportions before adding to cart
10. Flat-measure a garment you own and compare
11. Build a personal fit reference card
Key Numbers to Remember
Petite inseam range: 25–29 inches
Petite rise range: 8–10 inches
Petite shoulder width: 14–15.5 inches
Ease in body-measurement charts: 0 inches (match your exact numbers)
Ease in garment-measurement charts: 2–4 inches (garment is larger than your body)
Flat-lay “chest” number: double it to get full garment bust
Retake measurements every 6 months
Save or screenshot this card for your next shopping trip
Total Time
20 min
First time only
Active Time
15 min
Measuring + reading
Difficulty
Beginner
No experience needed

1. Gather a soft tape measure and one outfit that fits you well
A woman measures the length of her inseam by holding a soft yellow measuring tape vertically from the inner thigh crease down to the ankle while standing barefoot on a wooden floor.

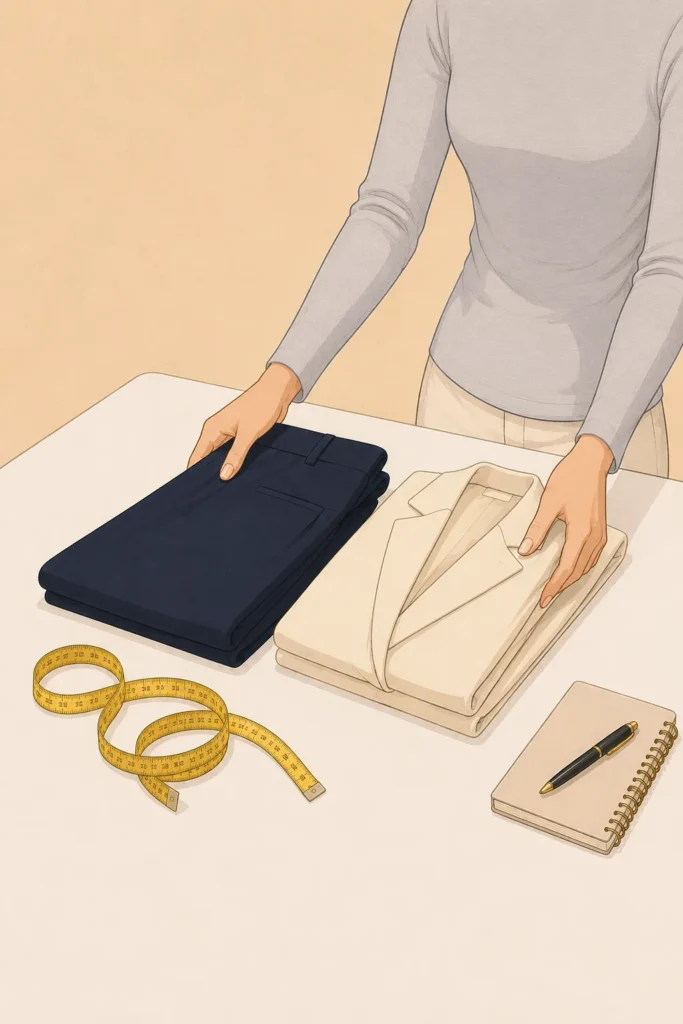
Two things before you open a single size chart. A soft fabric tape measure. Not a metal construction one. And one workwear outfit that already fits you well. That outfit becomes your comparison tool in Step 10.

Put on thin, form-fitting clothes. Stand in front of a mirror. Keep a pen and paper close enough to grab between measurements. Write down each number the moment you get it.

What You Need
Soft fabric tape measure
Full-length mirror
Thin, fitted top and pants or leggings
Pen and paper (or your phone’s notes app)
One workwear piece that already fits you well
A flat surface (table or countertop)
Fabric tape measures cost under $3 at most craft, dollar, or sewing supply stores. No tape measure? A piece of string and a ruler works in a pinch.

2. Measure your bust, waist, and hips
A woman arranges neatly folded dark navy tailored trousers and a cream blazer on a white table, with a yellow fabric measuring tape, notebook, and pen placed nearby.

These three numbers are the foundation of every size chart you will ever read. Take them in this order:

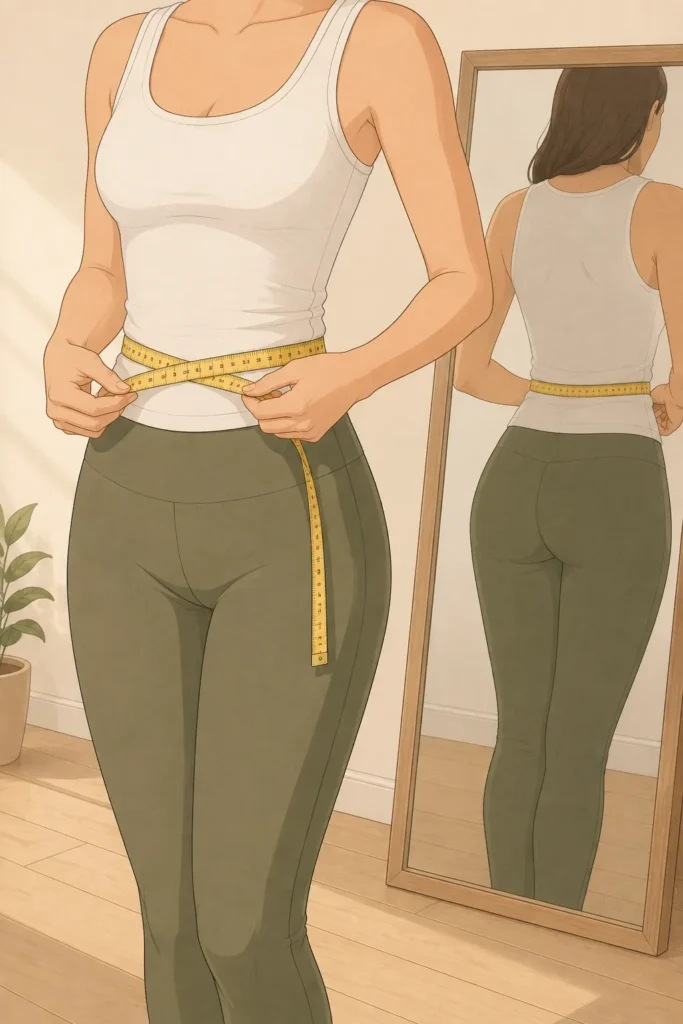
  • Bust: Wrap the tape around the fullest part of your chest. Run it straight across your shoulder blades. Keep it level and snug. Not tight enough to compress anything.
  • Waist: Find the narrowest point of your torso. That is usually about 1 inch above your belly button. Wrap the tape there.
  • Hips: Stand with your feet together. Wrap the tape around the widest part of your hips and backside. Keep it parallel to the floor.

Write all three numbers down in inches. Do not round up or down.

Pro Tip
Breathe normally while measuring your waist. Most people instinctively hold their breath or suck in. That can shave 1 to 2 inches off the real number. The smaller measurement lands you in a tighter size. And workwear that pinches every time you sit at your desk.

3. Measure your inseam from inner thigh to ankle bone
A woman in olive green leggings and a fitted white tank top measures her natural waist with a yellow fabric tape measure while checking the measurement in a full-length mirror.

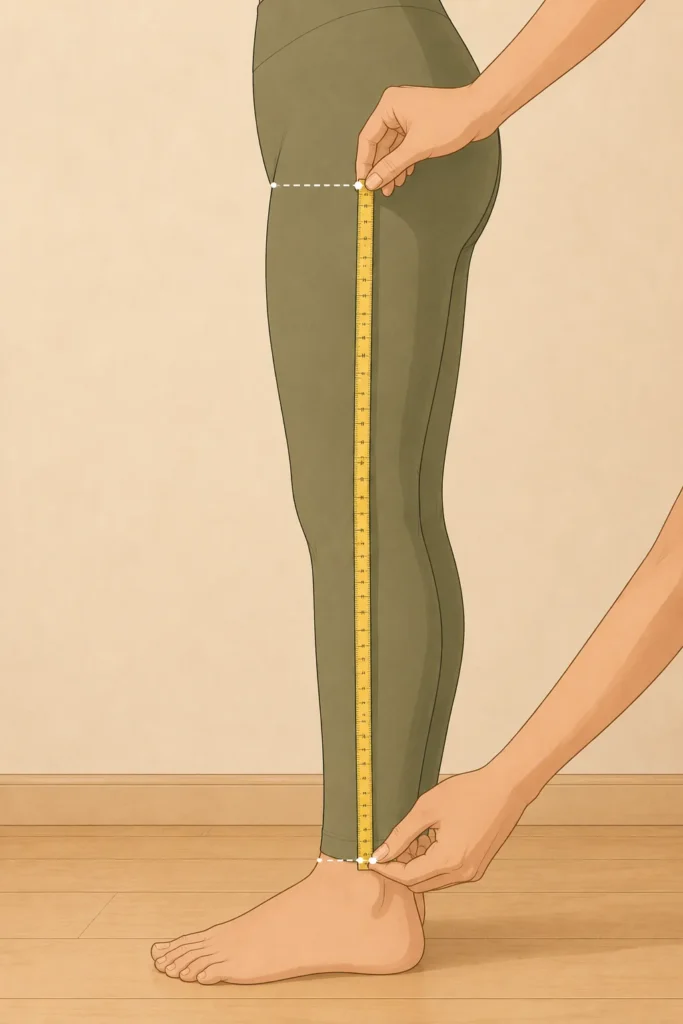
Stand straight. Feet about hip-width apart. Have someone measure from the crease where your inner thigh meets your body, straight down to your ankle bone. Not to the floor. Your ankle bone.

For most petite women, this number falls between 25 and 29 inches depending on height. If nobody is around to help, grab a pair of well-fitting pants instead. Measure from the crotch seam straight down to the hem. That gives you a close enough number to work with.

4. Measure your rise from waistband to crotch seam
A close-up side view shows a woman measuring her inner leg length with a yellow tape measure stretched from the inner thigh crease to the ankle bone, with both measurement points clearly marked.

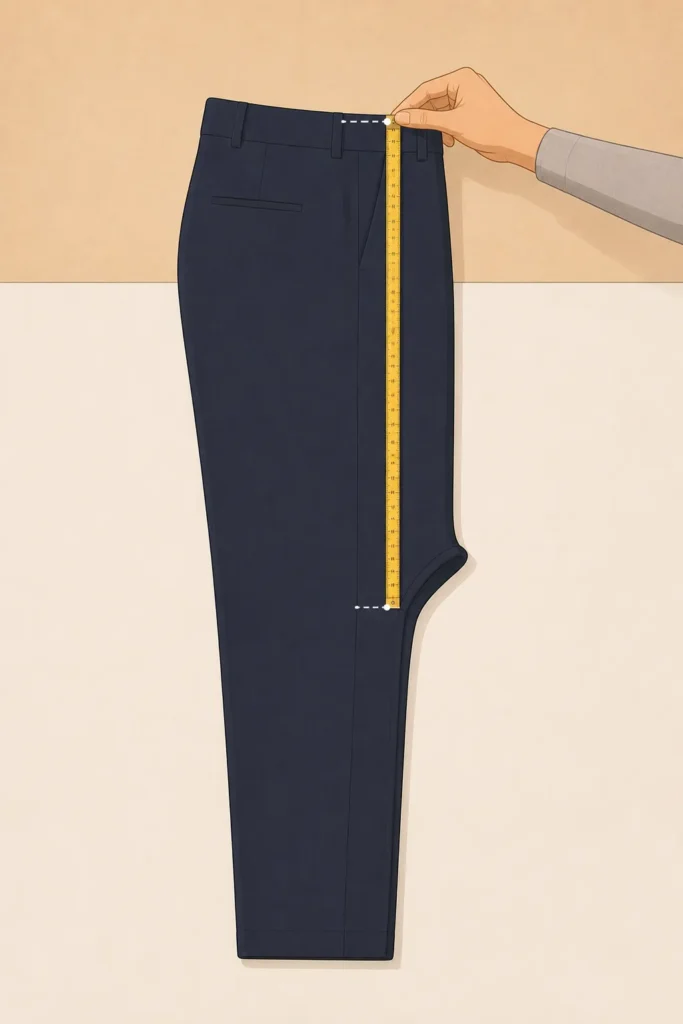
Most petite women skip this measurement. That is exactly why their work pants never sit right. The rise is the distance from your natural waist down to your crotch. It controls where the waistband lands on your body.

Worthy Reading : How to Wear Wide Leg Jeans Petite Without Looking an Inch Shorter

Grab those well-fitting pants from Step 1. Lay them flat. Measure from the top of the waistband straight down to the crotch seam. Write that number down. For petite frames, the rise on work trousers usually falls between 8 and 10 inches.

Heads Up
A “mid-rise” label on regular-sized pants does not mean the same thing on a petite frame. Regular mid-rise is typically 9 to 10 inches. On a shorter torso, that can hit closer to your ribcage. Look for petite-specific rise numbers. The label alone will mislead you.

5. Measure your shoulder width and sleeve length
A pair of dark navy tailored trousers lies flat on a white surface while a yellow measuring tape is held vertically from the top of the waistband to the crotch seam to measure the rise.

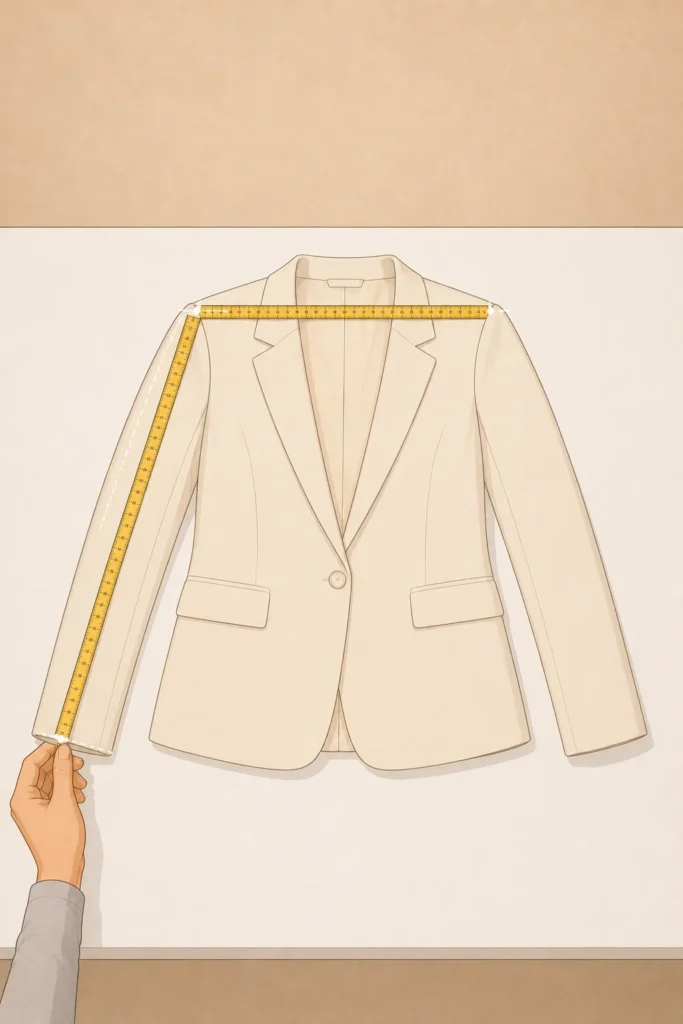
If you buy blazers, structured blouses, or tailored jackets for work, these two numbers decide whether the piece looks polished or borrowed.

i) Shoulder width

Have someone measure across your upper back from one shoulder bone to the other. The tape should sit right where your arm meets your shoulder on each side. Most petite women measure between 14 and 15.5 inches here.

Related: 22 Petite Blazer Outfits Styled Around the Right Shoulder Fit

ii) Sleeve length

Start from the center back of your neck. Run the tape across your shoulder, down your arm, and stop at your wrist bone. This one is hard to do alone. If you cannot get help, measure a blazer sleeve that fits you well instead. Lay the blazer flat and measure from the shoulder seam to the cuff.

What Changes After This Guide
Before
Ordering your “usual size” and hoping it fits

Returning half of what you buy because sleeves, rise, or shoulders are off

Spending money on alterations for clothes that were the wrong proportions from the start

Avoiding online shopping for workwear entirely
After
Knowing your exact bust, waist, hip, inseam, rise, shoulder, and sleeve numbers

Reading any brand’s size chart in under 2 minutes

Spotting whether a chart shows body or garment measurements before you order

Keeping a reusable reference card that saves you time across every brand

6. Find the petite size chart for the specific brand and item
A cream blazer is laid flat and fully spread open while yellow measuring tapes show the shoulder width across the seams and the sleeve length from the shoulder to the cuff.

Here is where most people get tripped up. They Google “petite size chart” and use a generic one. That will not work. Every brand cuts differently.

Go to the product page for the exact item you want to buy. Scroll past the photos. Look for a link that says “Size Guide,” “Size Chart,” or “Fit Details.” It is usually near the size dropdown or in a small tab below the product description.

Click it. Make sure it says “Petite” at the top. Many brands show their regular chart by default. You need to toggle or scroll to the petite version. If the brand does not have a separate petite chart, that is a red flag. It often means they shortened the length but did not adjust the proportions.

Read next: Fix These 7 Petite Work Outfit Mistakes Before Your Next Monday

7. Check whether the chart lists body measurements or garment measurements
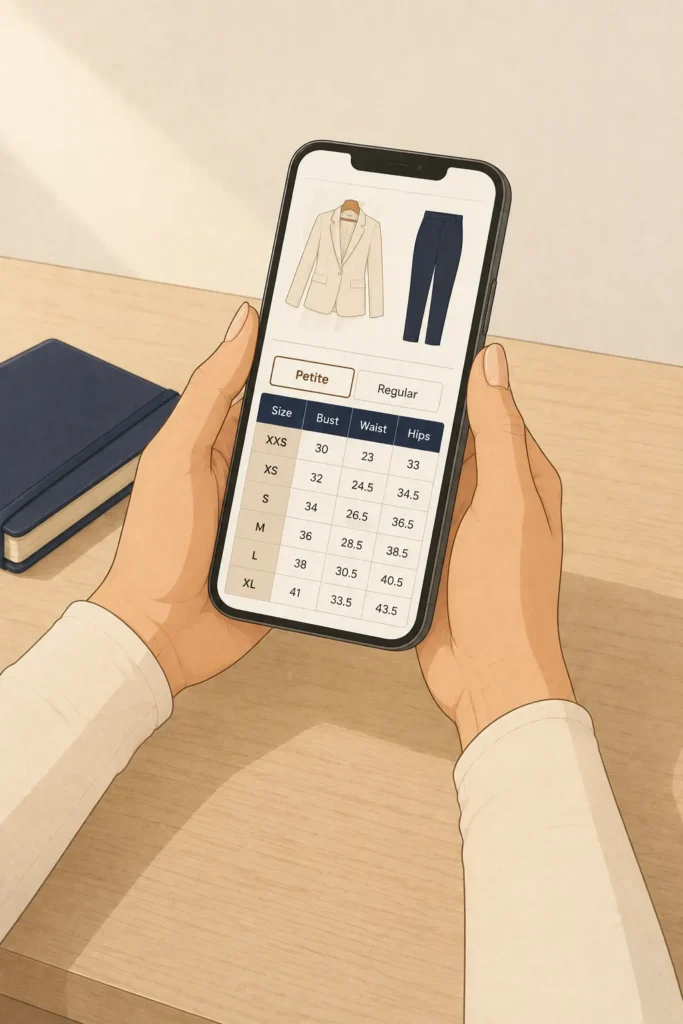
A woman holds a smartphone displaying a clothing product page with a Petite size chart, while the Petite option is visibly selected next to an unselected Regular option.

This is the single biggest reason petite women order the wrong size online. And almost nobody talks about it.

A body measurement chart shows what your body should measure to fit into that size. A garment measurement chart shows what the clothing itself measures when laid flat on a table. The difference matters. A blazer in size 4P might show a 37-inch bust on a garment chart.

That does not mean you need a 37-inch bust. The garment includes 2 to 4 inches of extra room called “ease.” Your actual bust might be 33 or 34 inches and that blazer would fit you well.

Look at the top of the chart. It should say “Body Measurements” or “Garment Measurements.” Some brands label it “Flat Measurements.” If there is no label, check the numbers. When the bust column shows numbers much larger than typical body sizes, you are looking at garment measurements.

Pro Tip
Some charts show a single “chest” number like 18.5 inches. That is a flat-lay measurement taken across one side of the garment. You need to double it. So 18.5 inches flat = 37 inches total. Miss this detail and you will order two sizes too small.

8. Match your widest measurement to the chart first
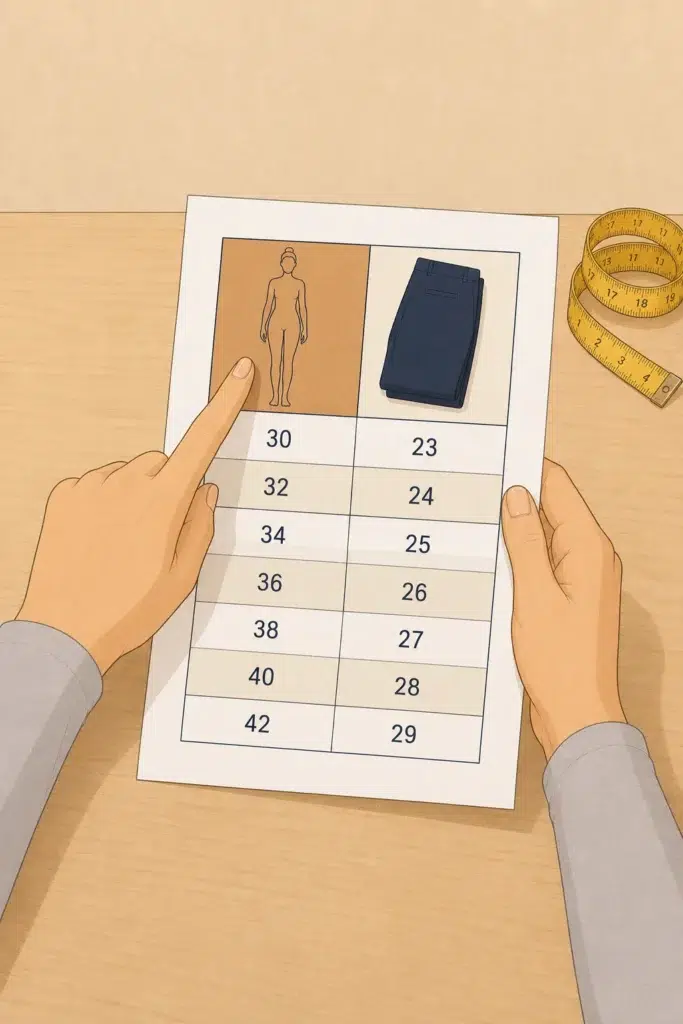
Hands hold a printed clothing size chart on a wooden desk while one finger points toward the body measurement column and a yellow measuring tape rests nearby.

Do not start with your waist. Start with whichever of your three core numbers (bust, waist, hips) is the furthest from the chart’s center range. That is your anchor measurement.

Here is why. If your bust is a size 4P but your hips are a size 6P, ordering the 4P gets you a blazer that buttons but trousers that pull across the thighs. Your widest measurement tells you the minimum size that will fit your frame. A waist that runs smaller can be fixed with a belt or a quick dart at the tailor. Hips that are too tight cannot be fixed at all.

Find your anchor number on the chart. That is your starting size.

Standard Petite Size Chart
Body measurements  •  For women 5’4″ and under  •  Toggle between inches and centimeters
IN
Tops, Dresses & Blazers
Size Guidance (Inches)
US Petite EUR UK Bust (in) Waist (in) Hip (in)
Bottoms
Size Guidance (Inches)
US Petite Waist (in) Hip (in)
All measurements are body measurements, not garment measurements. Ranges reflect variance across major petite workwear brands. If your measurements fall in different rows, order the size that fits your largest measurement. A smaller waist can be tailored. Hips that are too tight cannot.
Checkpoint: All 11 Steps
Gather a soft tape measure and one outfit that fits you well
Measure your bust, waist, and hips
Measure your inseam from inner thigh to ankle bone
Measure your rise from waistband to crotch seam
Measure your shoulder width and sleeve length
Find the petite size chart for the specific brand and item
Check whether the chart lists body or garment measurements
Match your widest measurement to the chart first
9Cross-check the vertical proportions before you add to cart
10Flat-measure a workwear piece you already own and compare
11Build a personal fit reference card you can reuse

9. Cross-check the vertical proportions before you add to cart
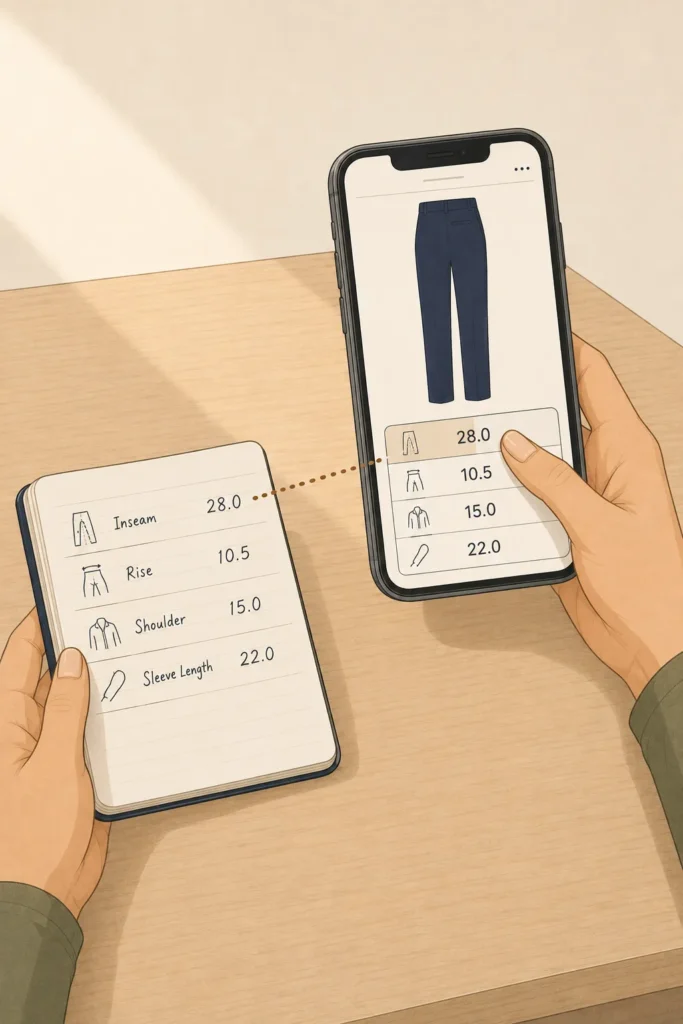
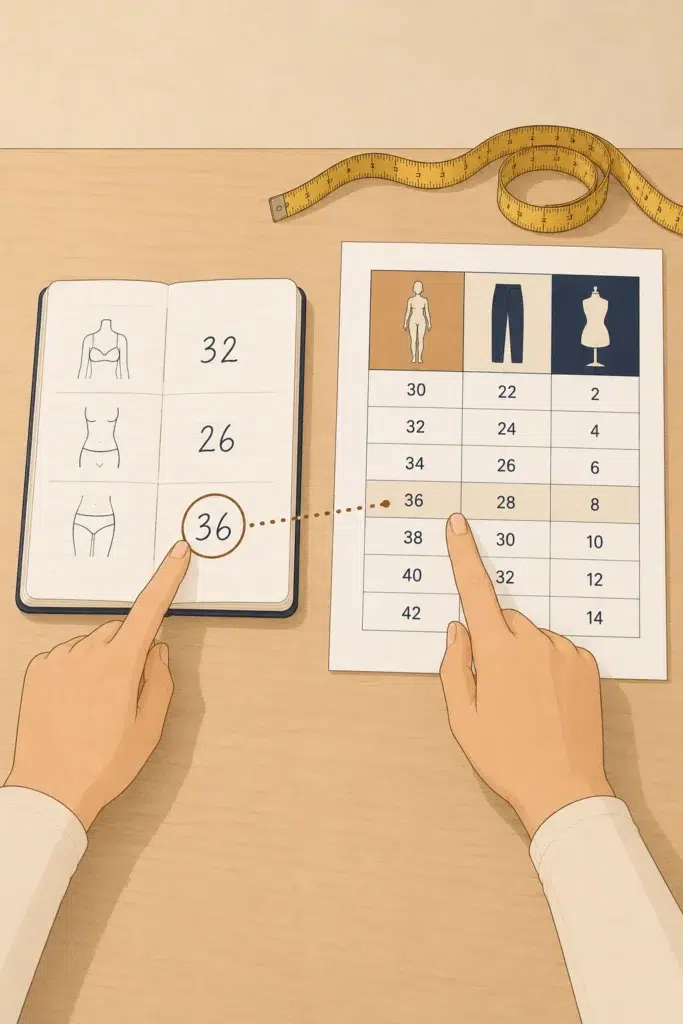
A woman compares clothing measurements by pointing to an inseam measurement on a smartphone while an open notebook beside it contains her corresponding body and garment measurements.

Your size number is set. But do not hit “Add to Cart” yet. Petite workwear sizing is not only about bust, waist, and hips. The vertical measurements are where regular and petite sizes differ most.

Pull up the product details. Look for inseam, rise, shoulder width, and sleeve length. Compare each one to the numbers you wrote down in Steps 3 through 5. Even a 1-inch difference in rise can change where the waistband sits. A 2-inch difference in sleeve length means the cuffs will cover your hands.

Heads Up
Not every product page lists these vertical measurements. If a brand shows bust, waist, and hips but nothing about inseam or rise, check the “Details” or “Fit Notes” tab. Still nothing? That means you are flying blind on proportions. For petite workwear, skip that item and find a brand that gives you the full picture.

10. Flat-measure a workwear piece you already own and compare
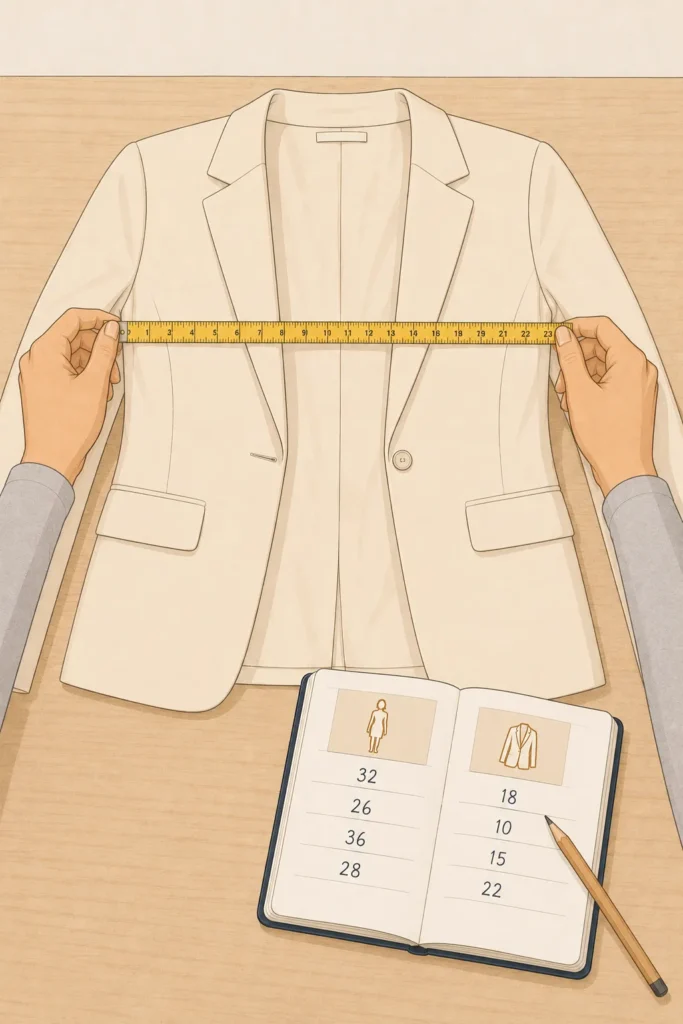
A cream blazer is laid flat on a wooden table while two hands stretch a yellow measuring tape horizontally from one armpit seam to the other to measure the garment's flat chest width.

That blazer or pair of trousers from Step 1? Time to use it. Lay it flat on a table. Smooth out any wrinkles. Now measure it the same way a brand would.

For a top or blazer, measure across the chest from armpit seam to armpit seam. That gives you the half-chest number. Double it for the full garment bust. For trousers, measure the waistband from one end to the other. Double that too. Then measure the inseam from crotch seam to hem.

Write these numbers next to your body measurements. Now you have two columns. Your body. And a garment that fits. When you look at a brand’s size chart, you can compare garment-to-garment instead of guessing how much ease you need. This trick cuts out most of the math.

Pro Tip
Use this flat-measuring trick on anything in your closet that fits well. Not only workwear. A dress. A denim jacket. A skirt. Each piece gives you a real-world reference number for that garment type. Over time, you build a small library of fit data that makes online shopping faster every time.

11. Build a personal fit reference card you can reuse
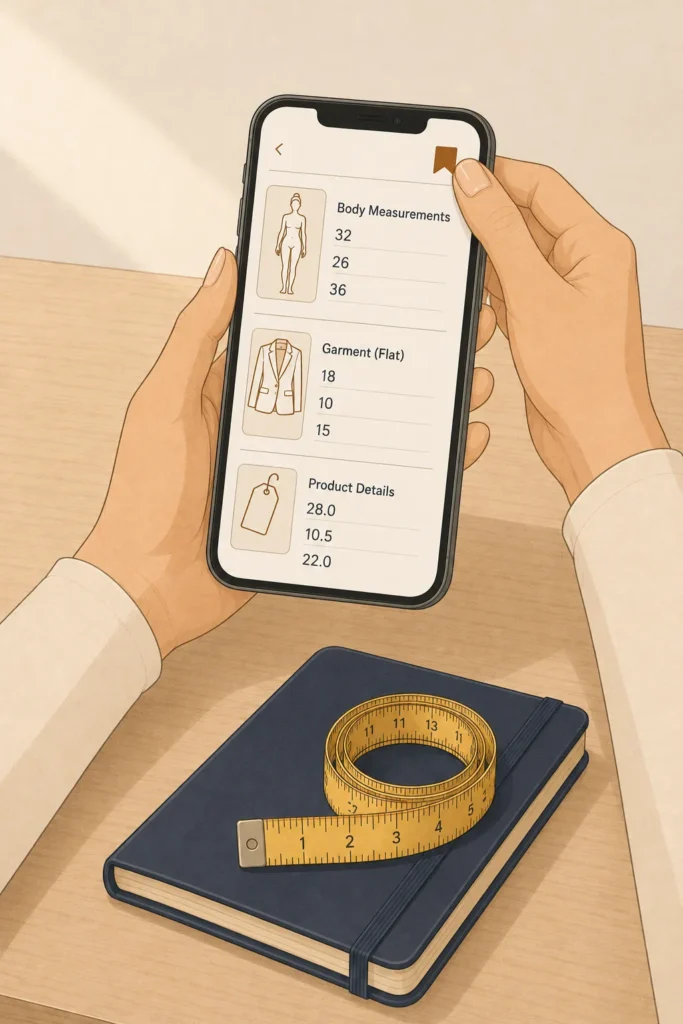
A woman holds a smartphone displaying saved body and garment measurements in a notes app, with a navy notebook and coiled yellow measuring tape resting on the desk below.

Open your phone’s notes app. Create a new note titled “My Petite Sizing.” Fill it in with everything you have written down across Steps 2 through 10. Organize it into three sections:

Section 1 — My Body Bust, waist, hips, inseam, rise, shoulder width, sleeve length. All in inches.

Section 2 — My Best-Fitting Garments The flat-lay measurements from Step 10. Label each one by garment type. “Black Ann Taylor trousers: waist 27, hip 36, inseam 27, rise 9.” “Navy Banana Republic blazer: chest 36, shoulder 15, sleeve 22.”

Section 3 — My Sizes by Brand Leave this blank for now. Every time you order something that fits, add the brand and size here. After three or four purchases, you will have a running record that tells you your size at each brand without checking the chart again.

That is your reference card. Save it somewhere you can pull it up while you shop. Screenshot it. Pin it. Bookmark it. Twenty minutes of measuring now saves you hours of returns later.

Frequently Asked Questions

The “P” stands for Petite. A size 6P has the same bust, waist, and hip measurements as a regular size 6. The difference is in the vertical proportions. Sleeve length, inseam, rise, shoulder width, and torso length are all shorter. It is not a smaller size. It is the same size cut for a shorter frame.

Yes. Petite has nothing to do with weight. It refers to height. If you are 5’4″ or under, petite sizing is designed for your proportions. Petite lines go up to size 18P, 20P, and beyond depending on the brand. A petite size 14 fits a woman who is shorter in height and wears a 14 in the body.

You can shorten a hem or sleeve. But hemming does not fix the rise, knee placement, shoulder width, or armhole height. Those proportions are built into the pattern. A regular-sized blazer hemmed at the sleeves will still have shoulder seams that sit too wide and armholes that drop too low. For structured workwear, petite sizing saves you from alterations that hemming cannot solve.

There is no universal sizing standard. A 4P at Ann Taylor and a 4P at Banana Republic are cut from different patterns with different ease allowances. Brand-to-brand variation can be 0.5 to 2 inches across bust, waist, and hip measurements. This is exactly why knowing your own numbers and reading each brand’s chart matters more than memorizing a single size.

For structured workwear like blazers, trousers, and pencil skirts, size up. You can tailor a slightly loose blazer. You cannot stretch a too-tight one. For knit tops, shells, and anything with stretch fabric, you can stay with the smaller size. The fabric will give. Woven fabrics will not.

Every six months is a good rule. Your body shifts with seasons, routine changes, and time. A 1-inch change at the waist or hips can move you into a different size at some brands. Update your reference card twice a year and you will stay ahead of it.

Conclusion

You now have a full set of body measurements, a way to read any brand’s size chart, and a reference card you can pull up on your phone every time you shop. That is more sizing information than most people carry around in a lifetime of buying clothes.

Start with one purchase. Use your numbers. Compare your measurements to the chart. Check the vertical proportions. See how close the fit is when the package arrives.

Related. : How to Look Taller at Work With 9 Outfit Fixes

The more you use your reference card, the faster it gets. If this guide helped you nail your petite workwear sizing, save it to your Pinterest board so you can find it again before your next shopping trip.
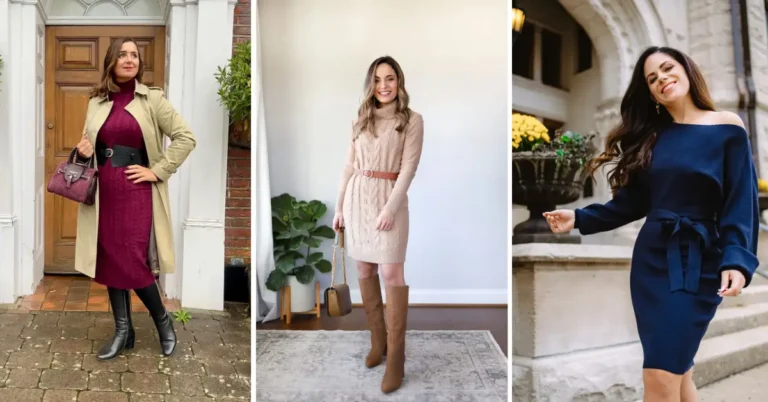
5 Sizing Mistakes Petite Women Make When Shopping for Workwear
1. Using a generic size chart instead of the brand’s own chart
Generic charts floating around Pinterest give rough estimates. Every brand cuts differently. Always go to the product page and find that brand’s petite chart for the specific item.
2. Confusing garment measurements with body measurements
A chart showing 37 inches at the bust does not mean your bust should be 37 inches. It could be the garment’s flat-lay measurement with ease built in. Check the chart header before matching your numbers.
3. Sizing based on waist only
Your waist might be a size 2P while your hips are a size 4P. Ordering the 2P means trousers that pull across the thighs. Always match your widest measurement first.
4. Ignoring the rise on work trousers
Two pants can be the same size with completely different rise measurements. A regular mid-rise on a petite frame can feel like a high-rise. Check the rise number, not the label.
5. Assuming “petite” means proportionally adjusted
Some brands label items “petite” but only shorten the inseam. They do not adjust the rise, shoulder width, or knee placement. If the size chart only shows a shorter length with no other changes, that is not true petite sizing.
Quick Reference Card
How to Read Workwear Size Charts When You’re Petite
What You Need
Soft fabric tape measure  •  Full-length mirror  •  Fitted clothing to wear while measuring  •  Pen and paper or phone notes  •  One well-fitting workwear piece  •  Flat surface
Measurements to Take
Bust (fullest point)  •  Waist (narrowest point)  •  Hips (widest point)  •  Inseam (inner thigh to ankle bone)  •  Rise (waist to crotch)  •  Shoulder width (bone to bone)  •  Sleeve length (center back neck to wrist)
Steps at a Glance
1. Gather tape measure and a well-fitting outfit
2. Measure bust, waist, and hips
3. Measure inseam to ankle bone
4. Measure rise from waistband to crotch seam
5. Measure shoulder width and sleeve length
6. Find the brand’s petite size chart for the specific item
7. Check if the chart shows body or garment measurements
8. Match your widest measurement to the chart first
9. Cross-check vertical proportions before adding to cart
10. Flat-measure a garment you own and compare
11. Build a personal fit reference card
Key Numbers to Remember
Petite inseam range: 25–29 inches
Petite rise range: 8–10 inches
Petite shoulder width: 14–15.5 inches
Ease in body-measurement charts: 0 inches (match your exact numbers)
Ease in garment-measurement charts: 2–4 inches (garment is larger than your body)
Flat-lay “chest” number: double it to get full garment bust
Retake measurements every 6 months
Save or screenshot this card for your next shopping trip

Similar Posts